Now that I had newly roasted chiles in the refrigerator, my next mission was to figure out how to use them. I decided that I would commit them to a rendition of mac-n-cheese featuring chiles, heretofore known as Chile Mac.
My recipe began with a thorough researching of traditional baked mac-n-cheese recipes and launched from there with chiles and flavors of the southwest as my theme. The preparation is fairly standard for mac-n-cheese, but the flavors are earthy and pleasantly piquant.
 I imagine some of you are wondering what the deal is with hatch chiles. Every August (or thereabouts) our Central Market stores get in truckloads of hatch chiles from New Mexico. Items all over the store become hatch-flavored - hatch burgers, hatch sausage, hatch salsas, hatch tortillas. The haul out gigantic roasters and the air smells wonderfully of gently roasting chiles, and you can purchase your hatches fresh or freshly roasted. The aficionados liken these chiles of New Mexico to the grapes in the great growing regions of the world. The area of New Mexico has the right balance of day length, climate, soil structure, etc. to produce a wonderfully flavorful chile. They’re long and pointy and about 4"-6" in length, and light green in color, and interestingly enough, are bred to have a variety of heat levels. Generally, we have two grades of chiles available to us in Texas, mild or hot, but my understanding is that the farmers in New Mexico have developed them to have several other grades of heat as well. At any rate they’re darned tasty and really good in this mac-n-cheese recipe. If you cannot find hatch chiles, you may look for either New Mexico green chiles or Anaheim chiles as a substitute. Japalenos may work as well, but I’d probably cut back on the number I added to the recipe.
HATCH CHILE MAC
The preparation for this recipe moves pretty fast. It’s best to have all your ingredients prepped and ready to go before beginning.
Move your oven rack to the middle/bottom of your oven, and turn the broiler on to preheat.
In a heavy gauge pot, heat salted water to a boil and cook the elbow macaroni. Once finished, drain in a colander, and bring the pot back to the stove. You’ll want to have the pasta cooked and out of the way for the next preparation step because it will likely require all of your attention.
Over medium-high heat, melt the first 3T of butter completely. Mix together the flour, mustard powder, and cumin. Once the butter is fully melted, dump the flour mixture in and whisk it until it the flour and butter are completely integrated and the mixture begins to give off a slightly nutty aroma (indicating that the flour has begun to cook somewhat, which will remove the sometimes pasty flavor of uncooked flour). For future reference, this (minus the mustard and cumin) is effectively a roux, and can be used as a thickening (and flavoring) agent for all sorts of sauces and soups.
Next, slowly mix in the milk. If you’ve never done this before, hang in there because some strange things will happen at this point. The trick, in my opinion, is to not pour in too much milk at once, at least not until you have enough integrated for the mixture to be liquid-like instead of clumpy and paste-like. Pour a bit of milk in and whisk till it’s gone, pour a bit more in, whisk, etc. Initially the very hot flour will absorb liquid like there’s no tomorrow and the mixture will go from a smooth roux to a thick clumpy mess. Keep adding milk in small increments and whisking it in quickly and eventually the mixture will loosen up and become a thick batter-like liquid. At that point, it’ll be all right to add larger increments of milk between mixing cycles. Once the milk is worked in, bring the mixture to a boil, stir in your chopped, roasted chiles, and reduce the heat to medium. The mixture must come to a boil for the full thickening power of the flour to take effect. Further, the thickening ability of the roux overall will vary depending one how long you cooked it initially. If the flour were raw, it would have the greatest thickening power. If the roux were cooked till it turned a nice deep shade of brown, it would have almost no thickening power at all (but loads of flavor). Hence there is a range in the amount of milk to add. You’re looking to add milk such that after boiling for a few minutes, the mixture has the consistency of heavy cream. If it thickens up too much during boiling, stir in a bit more milk and reboil for a moment till the consistency is correct. It will likely seem a bit too runny for mac-n-cheese, but fear not, we still have to add the cheese and pasta.
Remove the pot from the heat and stir in the cheeses, whisking until melted completely. Taste the sauce at this point and add ½ to 1 t of salt to taste. Reduce the burner heat to medium low, stir the pasta into the cheese sauce and cook for a few minutes to allow the pasta come up to temperature and to let the chile-cheese sauce cook into the pasta a bit.
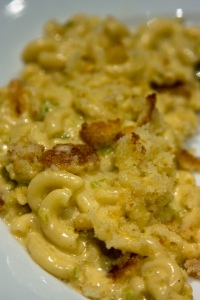
Once the macaroni mixture is piping hot, pour it into an 8"x8" glass baking dish. With a fork, mix the crumbled cornbread with the tablespoon of room temperature butter until the butter is thoroughly distributed throughout the cornbread crumbs. Then sprinkle the buttered crumbs over the top of the chile mac. (At this point, for an extra flourish, I sprinkled a bit of smoked salt over the cornbread crumbs, but this is certainly not necessary).
Chuck the chile mac in the oven and watch carefully for the cornbread crumbs to crisp up and brown beautifully. Remove the chile mac from the oven and allow to cool for a few minutes (to let the cheese solidify a bit and make the chile mac easier to serve).